Showing posts with label Jewish Cooking. Show all posts

Saturday, June 9, 2018

Knish (Onion and Potato Pastries)

A curious fact about Israel is that a lot of the foods typically associated with Jewish cuisine in the US, are virtually unknown to Israelis. For example, until a few years ago, you couldn't get a bagel in Israel to save your life, and even now supermarkets rarely sell them. Knishes are a similar deal. You can find Burkeas in every store, but I can't remember the last time I saw a knish anywhere.
So when a recurrences of pop-culture references to Knish made me crave some, there was no choice but to make them myself.

I opted for a version in which the potatoes and onion are mashed together to make a smooth filling, because I have a kid who will happily eat these just as long as there are no visible oniony-bits. If you prefer a bit more texture, add the onions in after you mash the potatoes.

The knishes can be made gluten free (the ones in the picture are!), but it does require having an excellent gluten free all purpose flour that you trust, as you do need to make a dough that is flexible enough to roll and delicious enough to eat.

Knish


 Ingredients (for 20-30 small knishes): 
For filling: 
- 3-4 potatoes (about 500 grams/1 lb), peeled and chopped into medium chunks.
- 1 large onion, diced.
- 3 tbsp oil, for frying.
- 1 tsp salt
- 1 tsp sugar (optional, although it gives a nice richness of flavor)
- 1/2 tsp black pepper 

For dough:
- 2 cups all purpose flour
- 1 tsp baking powder
- 1 egg
- 1/2 cup warm water
- 1/4 cup oil
- 1/2 tsp salt

For finishing: 
- 1 egg yolk beaten with a bit of milk

Preparation: 
1. Put the potatoes in a medium pot, cover with salted water, and cook on medium heat until the potatoes are soft. Drain.

2. While you wait, put frying oil in a pan, add the onions and cover. Sautee over medium-low heat until the onions are soft and translucent, then remove the lid and allow the onions to become golden-brown. Remove from heat.

3. Mash together the potatoes, onions, salt, sugar and pepper, either in a food processor, using a stick-blender, or using a masher, until very smooth. Remember: if you want to keep the onion texture, add the onions after the mashing process. Check for taste. The seasoning should be quite strong (stronger than you would want in mashed potatoes that you eat straight up), because there's only a bit of filling in each knish.

4. Prepare the dough: Preheat oven to 175 C/350 F. Line two baking sheets with parchment paper.  In a large bowl, beat the egg and water together, then add the oil and the salt and mix. Gradually add the flour, about 1/2 cup at a time, and mix thoroughly. When it starts to come together as a dough, start kneading, first in the bowl, then out on a well floured surface. The dough should feel smooth, not sticky, and elastic. If it's too sticky to knead comfortably, add some more flour. Knead for a few minutes to develop the gluten (or just until you have a usable nice dough, if you're making this GF).

5. Divide the dough into two balls. On a well floured surface, shape the first ball into a flat rectangle, and roll until very thin and quite large (about 30X20 cm, or 13X9 inches). Do the same with the other ball of dough.

6. Cut each rectangle into two, lengthwise (so you have two long and narrow pieces). Place about a quarter of the filling lengthwise along the center of each piece, then roll the dough (like a swiss roll) around the filling. Repeat for all the pieces.

7. Using a sharp knife, slice each roll into pieces, about 2.5 cm/1 inch long. Carefully lift each piece and place it, cut side down, in the baking tin, then gently push together the top section over the potato filling to slightly "close" the knish. This is a bit messy, and don't worry if it doesn't close altogether. The results are meant to be rustic.

8. When all of the knishes are placed on the baking tin, with a bit of distance between each one, brush them with the egg/milk mixture. Place in the over and bake for about 35-40 minutes, until the knishes are golden and fully baked.

Enjoy!


Friday, November 11, 2011

Challah (with GF option)

Making challah is really one of things that I like doing when I'm feeling a bit homesick or want to really feel like it's Friday. There's nothing like having the whole house smell of baking, and then get that beautiful golden loaf out of the oven. And if there are any leftovers, they also make the best french toast.  My favorite challahs are the ones that aren't particularly sweet, so this recipe is for a not-very-sweet challah.

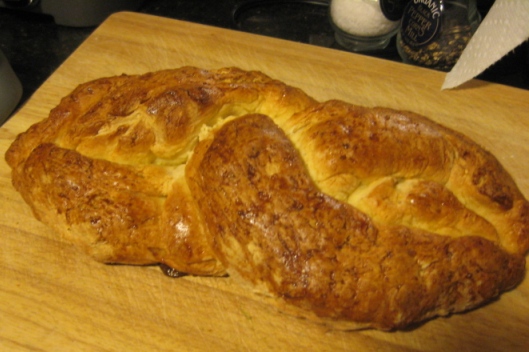
The joy of baking challah is something I've mostly given up since celiac entered our lives, because messing around with all that flour is not a great idea. There is the GF challah recipe I posted on Rosh Hashana. However, it's complicated and the results, while decent, are not quite satisfying enough. Then this week I saw that Cup4Cup flour (the new flour I mentioned in a recent post) published a recipe for bagels that looked really easy and convincing. I gave it a try and was pretty happy with the results. I therefore decided that it was time to put this flour to the ultimate test: would it really work when used, cup for cup, instead of regular flour, in a regular recipe, for bread?!?
Most gluten free flours would fail this test outright. However, C4C actually did pretty well. The challah you see in the picture is, in fact, entirely gluten free. The dough behaved almost exactly like gluteny dough and was easy to work with. The result is not quite as fluffy and wonderful as regular fresh challah, but it's pretty darn close as a substitute! Overall, C4C deserves outstanding marks as a GF flour that really works.

So here is the Challah recipe, in it's regular, non-GF version, which can also be made GF using Cup4Cup flour.NOTE that the recipe does require quite a long rising and baking time, so don't make this at the last minute.

Challah


Ingredients (for one large challah loaf): 

- 1.25 cup warm water 
- 1.5 tsp active dry yeast 
- 1/4 cup of honey 
- 2 tbsp vegetable oil 
- 1 egg + extra for eggwash
- 1.5 tsp salt
- 4 cups all purpose flour (or GF Cup4Cup flour) + extra for flouring

Preparation: 

1. Pour the warm water into a large bowl. Sprinkle the yeast over the water. Add the honey, oil, egg and salt. Mix well. Gradually add in the flour, mixing as you go along (you can also use a mixer with dough hook for this). When the flour is incorporated, knead until you get a smooth dough that no longer feels sticky (if you are making the GF version, there's not much point in a lot of kneading, since there is no gluten to develop. Just knead it a bit until it feels like a cohesive dough that isn't too sticky). Cover the bowl with a clean damp kitchen towel and allow to rise for 1.5 hours. 

2. Punch down the risen dough and put on a floured surface (for GF dough you may need a bit more flour, if it feels a bit stick). Knead the dough for about five minutes (again, if you are using GF, just knead it a bit until it is easy to work with). Divide the dough into three equal parts, shape each part into a long snake, attach the three snakes at one end and then braid them. Oil a baking tin or cover it with parchment paper, and put the challah on the tin. if your challah looks a bit bumpy - which can happen especially with the GF dough, moisten your hands a bit with water and gently rub the challah with moistened hands to smooth it up a bit.   Cover with a damp kitchen towel and allow to rise for another hour. 

3. Preheat oven to 375 F/180 C. Brush the challah with egg. Bake for about 30-40 minutes, until the challah is golden-brown and makes a hollow sound when you knock on the bottom of it.  


Enjoy!

Thursday, September 29, 2011

Kreplach (dumplings) GF/ Super-Easy non-GF way

Kreplach are little doughy dumplings stuffed with different fillings and usually served in a clear soup or broth. They are a traditional dish for Rosh Hashana and for the pre-fast meal on Yom Kippur.

This post contains two versions of kreplach: first, an easy trick (not really a recipe) for making regular kreplach very very quickly and with minimum hassle. Then a gluten free version, taken from here. 

For both versions I'm not including a recipe for filling, because there are various fillings you can try. My family usually uses one of those eggplant-based vegetarian  "chopped liver" spreads as the filling because it resembles the original meaty filling usually used in kreplach. You can also use sauteed mushrooms with onion. Since I'm a fan of neither mushrooms nor eggplants, I use mashed potatoes with golden fried onions as my fillings. Whichever filling you choose, you can use it for both the regular and the gluten free versions of this recipe.

One final word: Kreplach are a traditional dish, and a result it is perfectly ok if they look a bit "rustic". Don't worry about it if you don't get perfect, beautiful shapes, especially with the gluten free version. They will be just as delicious if the look a bit wonky.

Kreplach 


Above: Gluten Free version 


 Above: Regular (but easy) version

For regular kreplach: 
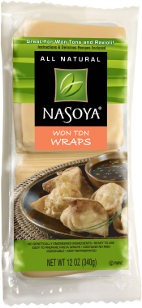
As I said, this is not so much a recipe as a "trick" for making them quickly and easily. Instead of working hard to prepare a dough, chill it, roll it thin and cut it... go to your local market and buy a pack of prepared and pre-cut wonton skins.


To make the kreplach, lay a wonton skin on your cook surface. Place about 1 heaping teaspoon of filling at its center. Take another skin and brush it with water place it (water side down) on the first skin and press down. To make a pretty envelope shape, fold two sides of the wrappers into the middle, sticking them down with water. If you prefer smaller, more delicate kreplach, use just one wrapper, put less filling, brush the sides with water and close it in on itself.

Boil some water in a pot, lightly salt them, then cook the kreplach in the water for just a few minutes, until they are soft and vaguely translucent.  You can prepare the kreplach in advance and freeze them.

For gluten free kreplach: 
Ingredients: 

- 150g (5 ½ oz ) Rice Flour
- plus a extra to help roll.
- 75g ( 3oz) Chickpea (garbanzo) flour
- 2 large eggs
- 2 tablespoons water
- Pinch salt

- Kreplach filling

 Preparation: 


1. Combine the flours and salt in a bowl. Make a well in the center and add the eggs and water. Stir until a dough forms. If it is too dry, add a little bit more water. If too wet, a bit more flour. Cover and allow to rest for at least 30 minutes in the fridge. 


2. If after 30 minutes your dough seems relatively workable (a bit sticky, but not too much) follow this step. If it seems too sticky, go to #3. Place a piece of parchment paper on your work surface and generously flour it with GF flour. place your dough on it, flour the top of it, and cover with another piece of parchment paper. Using a rolling pin, roll the dough out until it is quite thin (as thin as you can manage without the dough sticking completely to the paper. 


2b. Slice the dough into squares. Top each square with some filling, wet the sides with water or egg whites, and close it by folding it into a triangle, making sure to stick the edges. Repeat this for all of the dough.


3. If after 30 minutes the dough seems too sticky to roll out : generously flour the top of the dough, and also your hands. Take a little round of dough in your hand and pat it down until it is relatively thin (as thing as you can manage without it falling apart or sticking). Put a bit of filling in the center of the dough, and then using your hands close the dough over the filling. If necessary, add a bit more dough to close it over. 


4. Regardless of how you formed your kreplach, boil some water in a pot, slightly salt them, add a bit of oil to prevent sticking, and cook the kreplach for about five minutes, or until fully cooked. (If they came out relatively thick, you may need to cook a bit longer). 


Wednesday, September 28, 2011

Gluten Free Round Challah

It's the Jewish New Year (Rosh Hashana) tonight, and round challah bread is a traditional holiday food. The roundness of the challah symbolizes the circular nature of time, the fact that one year ends and another begins.

Several years ago I was determined to serve a gluten free challah for Rosh Hashana. I tried five different recipes, all of which came out wrong. Some looked pretty but tasted awful, while others tasted reasonable but baked up completely flat and failed to resemble a challah at all. And then I found this recipe from Gluten Free Sox Fan. The dough it made was sufficiently workable that I could actually create a nice round shape and the resulting bread was a decent approximation of challah.
I won't lie to you - it's not as good as the real thing. The bread is denser and less fluffy than real challah bread. But, it was good enough that when I served it to a table full of non-GF people, they all ate it and asked for seconds. 

Shana Tova!

Gluten Free Round Challah 


Ingredients (for one medium sized challah): 


- 1 cup warm water
- 1/4 cup sugar
- 1 1/2 teaspoons yeast
- 1 egg
- 2 egg yolks
- 3 tablespoons vegetable oil
- 1 teaspoon vinegar (I used apple cider vinegar)
- 3/4 cup brown rice flour
- 3/4 cup white rice flour
- 1/2 cup corn starch
- 1/2 cup tapioca starch
- 1/4 cup potato starch
- 1 tablespoon xanthan gum
- 1 teaspoon salt
- 1 egg, beaten, for egg wash (I used egg yolk, just because I had some left over from another recipe)

Preparation: 

1. Put the warm water, sugar and yeast in a small bowl and set aside until the yeast begins to rise and bubble (a few minutes).

2. In another small bowl, whisk together the egg, egg yolks, oil and vinegar (the egg may take on a strange consistency. This is fine).

3. In a large mixer bowl combine the brown rice flour, white rice flour, corn starch, tapioca starch, potato starch, xanthan gum and salt. Mix for a minute or so just to combine. Add the egg mixture and the yeast mixture, and knead using your mixer's dough hook until a dough is formed. (If you don't have a mixer, you can do this using a spoon/hands).

4. Lightly flour a piece of parchment paper with GF flour. Turn the dough out onto the floured surface and turn into a ball. Oil a bowl (I used the used mixer bowl) and put the dough in it, rolling it in the oil to coat. Cover the bowl with a clean kitchen towel and leave to rise about 30 minutes or until dough has doubled in size.

5. Preheat oven to 350 F/175 C. Line a baking tin with parchment paper. Gently take the oily dough out of the bowl and form into a rough circle. I found the dough was slightly difficult to work with, but sufficiently handable that it was possible to create a round shape, albeit not a very perfect one. Cover with a kitchen towel and allow to rise again for about 20 minutes. 

6. Brush the challah with egg wash, and bake for about 20 minutes, or until the challah looks ready and makes a slightly hollow sound when tapped on the bottom.


Monday, April 11, 2011

Kneidalach (Matzo Balls)

In my family, Pesach is not Pesach without kneidalach in clear vegetable soup. When I was a teen I used to help my mother make these, and I found myself wondering why it is that the balls sink when they are put in the water, but somehow float when they are cooked. I asked my physics teacher about this, and after asking some of his colleagues he told me that apparently the cooking changes the chemical composition of the matzo balls, altering their relative density to the water or something like that. So there you go - this is not just cooking, it's also science!


Like most traditional foods, each family has its own version  and the "correct way" to make kneidalach is subject to much contention.

One source of disagreement is the appropriate size for a matzo ball: some people like to serve a bowl of soup with one huge matzo ball at it's center. Other people like to make them delicate and petite. I like them somewhere in the middle, so I roll them to just under the size of ping-pong ball (they do grow later). But if you prefer them larger or smaller, by all means do it your way.

The second major source of disagreement is the texture: some people like their kneidalach to be really light and fluffy, and this is often the more "gourmet" approach. However, I admit I fall with the crowd that likes the kneidalach to be soft (never hard!) but dense. I just find them more satisfying this way.
However, if you prefer your matzo balls softer, don't give up on this recipe. Instead, before you add the eggs simply separate the whites from the yolks and beat the whites to a stiff foam. Then add the yolks to the matzo meal and fold the egg white foam in as well. 

Finally,  a small holiday tip: since cooking for a large family meal is often time consuming, I like to do it in little bits. Therefore, I always cook my kneidalach a week or even two before the Seder, after which I immediately freeze them. On the morning of the seder I simply pull them out of the freezer and allow them to defrost. Then I quickly reheat them in the soup or the microwave, and they are ready to serve.
 

Kneidalach (Matzo Balls) 


Ingredients (for about 14 medium balls): 

- 1 cup matzo meal 
- 2-3 tbsp of canola oil (this is actually optional. They work pretty well without it) 
- 2 eggs 
- Pinch of salt 
- Vegetable broth or bullion powder for cooking (optional)

Preparation:

1. Put the matzo meal in a large bowl. Add the salt, oil and eggs (again - if you prefer a fluffier matzo ball, separate the eggs and beat the whites to a foam, then fold them back in), and stir. 

2. Begin adding lukewarm water - add a few tablespoons, then stir. Then add a few more and stir. Continue doing this until the mixture sticks but is also a little loose (you don't want a really hard mixture at this point). Allow the mixture to sit for about 20-30 minutes. This will allow it to set and make it easier to work with. 

3. Meanwhile, heat up the cooking liquid. You can cook the matzo balls in the soup in which you'll serve them, but I prefer not to do that because it murks up the soup. Instead, I use boiling water with a few tablespoons of vegetarian bouillon powder. If you prefer, you can also use boiling vegetable broth, or simply boiling water with a little bit of salt. 

4. When the liquid is boiling, take a bit of the matzo meal mixture in your hands and roll it into a small ball (as I said, I like to roll them into a ball slightly smaller than a ping-pong ball). Carefully put the ball in the boiling liquid. Continue to roll the balls and add them to the liquid (how many balls at a time depends on how large a pot you are using. For a medium pot I put about 5 at a time). 

5. It is generally understood that the matzo balls are cooked when they float to the surface of the water. However, I like to leave them in there for about a minute longer, just to make sure they are properly cooked. When they are ready, take them out with a slotted spoon.  I recommend tasting the first one to come out of the water: this allows you not only to gauge how well it has cooked, but also to make sure that the mixture has enough salt in it. 

Traditionally these are served in a clear soup such as chicken or vegetable soup. However, they are also delicious served as a side dish with some fried onions.

Monday, December 13, 2010

Cholent/Hamin (slow cooking vegetable stew)

Cholent or Hamin is a traditional Jewish dish, because it can be put in the oven on Friday afternoon, before the Sabbath begins, and is ready to be eaten on Shabbat itself. Every Jewish community has its own version of this dish. This is my family's vegetarian variation on the Eastern European version.  It is a thick, delicious warm stew that is ideal for a cold, snowy winter weekend lunch, ideally followed by a long nap.

Important note: this dish quite literally cooks overnight, so you need to start prepping it the day before you plan to eat it. Also, I make it in the oven, but I understand a slow-cooker is actually perfect for this.

Cholent/Hamin


Ingredients (for four-six portions):

- 1 large onion, diced.
- 2 tsp oil
- 1 cup of white beans (navy, baked beans etc.). You can use canned or pre-cooked frozen. If you want to use dried beans, soak them in water overnight before beginning this recipe.
- 0.5 cup to 1 cup uncooked brown rice (you can also use wheat, pearl barley or white rice, but I like brown rice best for this).
- 3 medium potatoes, peeled and cut into ping-pong ball sized chunks.
- 2 carrots, chopped into large chunks
- seasoning: salt, pepper, paprika, chili powder, vegetarian natural bullion powder (optional)
- 4-6 hard boiled eggs, shelled (optional)

 Preparation: 

1. Choose a large pot that has a cover, and that is oven safe (and can fit in your oven). In it, heat the oil and fry the onions until golden.

2. Add the potatoes, carrots, beans and rice and mix. Fill the pot with water until the potatoes are fully covered in water. Season with plenty of salt and pepper, about a teaspoon each of paprika and chili powder, and a tablespoon or so of the bullion powder (you can skip the bullion powder, but it does give the finished dish a richer flavor. Consider seasoning more or perhaps adding a bit of veggie stock instead of water).

3. Let the ingredients go to a boil, then lower the heat and simmer for about 30 minutes.

4. Preheat your oven to a very low heat (200 F, about 100 C). Place the hard boiled eggs on top of the vegetable mixture. Cover the pot and place it in the oven.

5. Cook the Cholent overnight in the oven. Look at it from time to time, just to make sure that it is lightly simmering and looks ok. A note about the time: in an ideal world, the cholent should really be in the oven for at least twelve hours, as this allows all the flavors to meld and mix. However, most of us don't live in an ideal world. I've found it is still delicious if you just cook it for 5-6 hours. Also, if you don't want to leave your oven running all night, I find it also works fine if you cook it for a few hours in the evening, then turn off the oven, and turn it back on in the morning for a few more hours.

This dish really requires very little accompaniment. Serve it, as is, with a little fresh salad on the side.

Friday, December 3, 2010

Latkes (potato pancakes)

During Hannuka we are supposed to eat food that has been fried, supposedly to commemorate the miracle of the oil - but really, it's just a good excuse to eat something fried without feeling too guilty about it, right?

Latkes (or Levivot, in Hebrew) are a traditional Hannuka dish and everyone has their own version. This is mine (well, mostly my mother's).

A few tips: 

A. You will notice that this recipe separates the yolks from the whites and beats the whites into a stiff foam. You don't absolutely have to do this (you can just add the eggs as is), but the foam serves two purposes: it keeps the potatoes from browning while they wait to be fried, and - more importantly - it makes the latkes incredibly fluffy and delicious.

B. You will notice this recipe uses no flour or breadcrumbs, as some latke recipes do. However, it is therefore very important to squeeze as much liquid as possible out of the potatoes before using them. You can do this using a cheesecloth or a strainer, but I find the easiest way is actually to spin them in a salad spinner!

C. Like most fried foods, latkes are at their best when they are very very fresh, still hot from the oil. Realistically, however, no one really wants to stand around frying latkes during a Hannuka party, and even making them the same day as the party will leave the house smelling like oil. The solution is to freeze the latkes while they are still warm (if you have a large freezer, just freeze them flat on a baking tin. If not, an airtight container will do). When you want to serve them, place the frozen latkes flat on a baking tin, and place them in a warm oven for a few minutes, until they are heated through.

D. I have done my best to approximate quantities etc., but with things like potatoes it is impossible to know exactly how much of everything you will need.You may need to play a bit with the quantities to get it perfect.

Now, on to the recipe!

Latkes


Ingredients (for about 20-25 latkes): 

- 3 large potatoes, or  4-5 medium ones, peeled
- 1 large onion 
- 3-4 eggs, separated into yolks and whites (if you want extra-fluffy latkes, you can add a few more whites). 
- Salt and pepper 
- Canola oil or other oil for deep frying (not olive oil!) 

Preparation: 

1. Beat the egg whites until they form a stiff foam. 

2. Grate or shred the potatoes and the onion (a food processor will make this much easier, of course, but manual is also good). 

3. Using your hands, a cheese cloth, a strainer or a salad spinner, squeeze as much moisture as possible out of the shredded potatoes and onions. Place them in a large bowl.

4. Add the yolks and the beaten egg whites to the potatoes and gently fold until the yolks, potatoes and onions are really incorporated into the foam. The mixture should look very fluffy but not completely liquid. If it is too liquid, add some more potatoes or some flour or breadcrumbs to the mix. If it seems too dry, add some more egg.  Season the mixture with salt and pepper. 

5. In a large frying pan heat about an inch (2.5 cm) of oil. When the oil is hot (you can test this by putting a wooden spoon in the oil. If it starts to "fry", the oil is hot enough), drop a few spoonfuls of the mixture into the oil, to create patties. Fry them until they are a deep golden brown on both sides (you will need to flip them). 
Pay attention to the oil! If the latkes seem to fry too fast, lower the heat. If they fry too slowly, raise it a bit.

6. When the latkes are golden brown, place them on some paper towel to drain. I recommend tasting one from the first batch, to make sure the seasoning is correct. If it isn't, you can always add some more salt and pepper. And since after you eat one you will probably want another, I also recommend making a few extras. 
7. Continue frying until all the latkes are made (if you start to run out of oil in the middle, just heat up some more).  They can be served as either a savory or a sweet dish, with sour cream, sugar and cinnamon, or applesauce. I usually offer a choice of all three, so everyone can eat them the way they like.

Happy Hannuka!